On this page · 14 sections
- What Apple Pay launched in India
- What is available and what is not
- How Apple Pay actually works
- Apple Pay vs UPI: different problems
- What developers need
- Native iOS integration with PassKit
- The payment token and backend flow
- Integrating through a payment service provider
- Apple Pay on the web
- Security, privacy and tokenisation
- Why Apple Pay can help Indian apps
- Developer implementation checklist
- How eCorpIT can help
- References
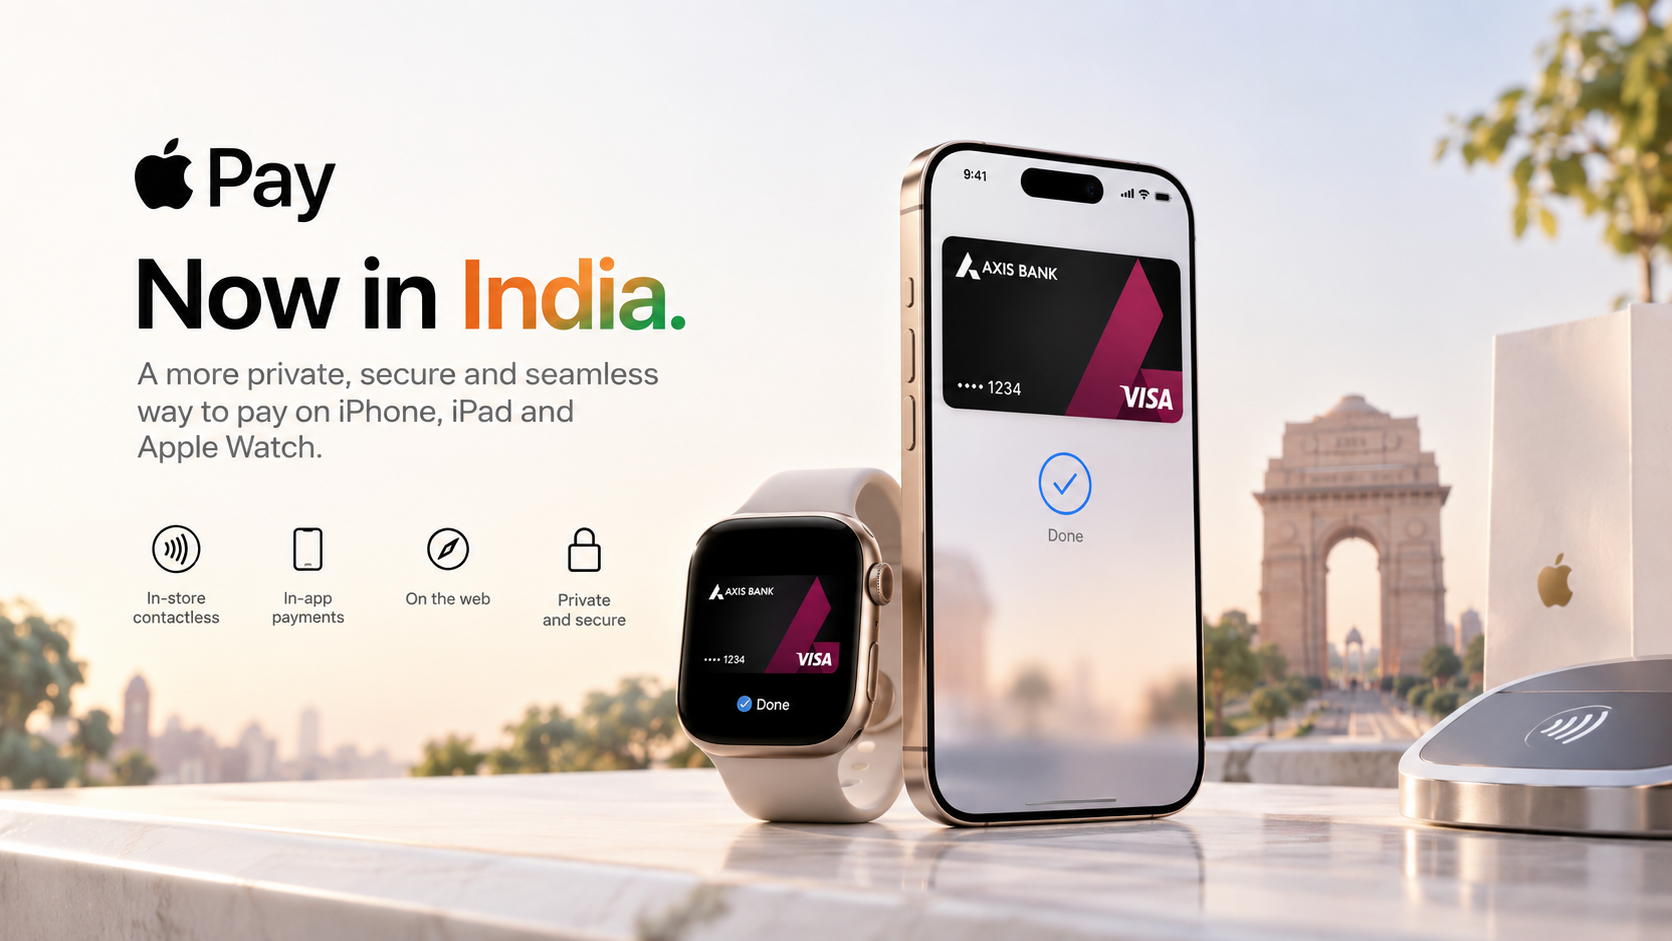
Summary. Apple Pay launched in India on 30 September 2026 on iPhone, iPad and Apple Watch, with Mac support coming soon. At launch it works with Axis Bank-issued Visa and Mastercard credit cards, in stores, in apps and on the web, and Reuters reports that RuPay cards aren't eligible. For developers, integration means a merchant ID, a payment processing certificate or a payment service provider (PSP) that handles it, PassKit or Apple's web APIs, and a backend that decides whether each payment succeeded.
For developers, the useful question isn't just whether Apple Pay is available in India. It is what an Indian team can build with it today: which payment methods actually work, what Apple handles, what the merchant or PSP handles, and how to integrate it correctly. The consumer launch and the developer integration are two different layers.
Apple Pay provides the payment sheet, device authentication and tokenisation. Your app still needs a merchant identifier, payment processing configuration, a PSP or processing backend that supports Apple Pay, and a server-side flow that processes the resulting payment token. This guide covers the launch, its limits, the security model, native Swift integration, the web, PSPs, and what Apple Pay does and doesn't replace in an Indian payment stack.
About this article. This guide is based on Apple's India launch announcement of 30 September 2026 and on Apple's Apple Pay, PassKit and App Review documentation, as checked on the same day. Card, bank and device support in India will change as Apple, banks, card networks and PSPs expand, so check the current position before a production integration. Researched with AI assistance and reviewed by our editorial team.
What Apple Pay launched in India
Apple says Apple Pay is available in India on iPhone, iPad and Apple Watch, with Mac support coming soon. The fine print sets the device floor: iPhone XR or later with iOS 18 or later, and Apple Watch Series 6 or later with watchOS 11 or later, paired with an iPhone XR or later.
- Cards: Axis Bank-issued Visa and Mastercard credit cards, added through the Axis Bank app or the Wallet app.
- Where it works: in stores, in apps and on the web, and Apple says without typing a PIN or an OTP at checkout.
- Merchants: Apple says the Axis Bank cards work at thousands of in-store and online merchants and anywhere that accepts contactless (NFC) payments, and that Apple Pay will be accepted by millions of merchants at launch, including Apple Store locations, Blinkit, Chaayos, Comet, Croma, Interflora, Ixigo, Le15 Patisserie, Reliance brands, Tata 1mg and Zomato.
- Payment service providers: Apple worked with PSPs including BillDesk, Cashfree, Juspay, Mswipe, Paytm, PayU, Pine Labs and Razorpay to bring Apple Pay to their merchant networks, with more merchants and apps to follow.
- Worldwide: Apple Pay is available in more than 90 countries and regions and works with more than 11,000 bank and network partners.
Reuters adds that Axis Bank, India's third-largest private lender, is the first Indian bank to offer Apple Pay, that RuPay cards won't be eligible, and that Apple has held talks with HDFC Bank and ICICI Bank without yet agreeing commercial terms.
The PSP list matters for developers. Accepting Apple Pay isn't only a matter of adding a button: the payment-processing ecosystem behind your checkout must support it too.
What is available and what is not
Treat the India launch as a supported subset, not as every Indian payment method arriving in Apple Pay on day one.
| Capability | At launch in India |
|---|---|
| iPhone, iPad and Apple Watch | Available |
| Mac | Coming soon |
| Axis Bank Visa and Mastercard credit cards | Supported |
| RuPay cards | Not eligible, per Reuters |
| Cards from other banks | Not announced |
| Debit cards | Not announced |
| UPI as a funding source | Not announced |
| In-store contactless payments | Available |
| Payments in apps and on the web | Available on iPhone and iPad |
| PIN or OTP at checkout | Not needed, according to Apple |
Use careful wording in product copy: say a method isn't supported at launch, not that it never will be. PassKit does include a PKPaymentNetwork.ruPay constant, but an API constant isn't the same as consumer availability, which depends on Apple's regional support, participating issuers and networks.
India's card-authentication rules are also evolving, so read Apple's no-OTP claim alongside our guide to RBI's authentication directions and your PSP's own guidance.
How Apple Pay actually works
Apple Pay isn't just another checkout form. The flow looks like this:
            Customer
   ↓
Your iOS app or website
   ↓
Apple Pay payment sheet (card choice, contact details, authentication)
   ↓
Encrypted payment token
   ↓
Your backend and PSP
   ↓
Card network, then issuing bank
   ↓
Approve or decline
Your app never receives the customer's card number. The encrypted payment data includes a device-specific account number for the card and, for 3-D Secure payments, an online payment cryptogram. Apple's servers encrypt the data with your payment processing certificate's public key, and you, or your PSP on your behalf, decrypt it with the private key. If the card network adds an ECI indicator, Apple says you must pass it to your payment processor, or the transaction fails.
That splits the work into two halves.
In the app:
- Show the Apple Pay button.
- Create a
PKPaymentRequest.
- Present the Apple Pay sheet.
- Handle the person's authorisation.
- Receive the resulting payment token.
- Send the token to your backend.
On the server, or at your PSP:
- Receive the payment data.
- Decrypt or forward the token, depending on your integration model.
- Submit the payment for authorisation.
- Receive the result.
- Update the order status.
- Return the result to the app.
Apple Pay vs UPI: different problems
Apple Pay's arrival doesn't mean it replaces UPI. They work at different layers. UPI is India's account-to-account payment system, moving money from one bank account to another. Apple Pay is a wallet experience built on tokenised card payments, running over the card networks to the issuing bank.
If your app already offers UPI, cards, net banking and wallets, adding Apple Pay doesn't mean removing any of them. It becomes one more option wherever the customer's device, card, your PSP and the regional setup all support it. If UPI reliability is a priority, see our multi-PSP UPI checkout service.
For a customer with an eligible card already in Wallet, Apple Pay removes most of the typing. A traditional card checkout asks for the card number, expiry date, CVV and then a verification step. With Apple Pay, the customer taps the button, authenticates with Face ID, Touch ID or a passcode, and pays.
What developers need
For a native iOS app, Apple Pay uses PassKit. Apple's setup guide lists three steps.
1. Create a merchant identifier
Register a merchant ID in your Apple Developer account, usually in reverse-domain form starting with merchant, such as merchant.com.example.store. It identifies your business as a merchant. Apple says the ID never expires and can be used in several websites and apps.
2. Create a payment processing certificate
Create a certificate tied to your merchant ID. Apple Pay's servers use its public key to encrypt payment data, and you or your PSP use the private key to decrypt it. If you use an e-commerce provider or payment platform, Apple says to contact them about how their service works with Apple Pay, rather than building your own token handling.
3. Enable Apple Pay in Xcode
In Xcode, select your target, open Signing & Capabilities, click + and add the Apple Pay capability. Refresh to sync your merchant IDs from your developer account, then select the one this app uses. This writes your merchant IDs into the com.apple.developer.in-app-payments entitlement.
Check the App Review rules before you design checkout
Apple Pay isn't allowed for everything an app sells. Under App Review Guideline 3.1.1, anything that unlocks features or content inside the app, such as subscriptions or premium content, must use In-App Purchase. Guideline 3.1.3(e) says physical goods and services consumed outside the app must use another payment method, such as Apple Pay.
Guideline 4.9 adds that apps using Apple Pay must show all material purchase information before the sale and use Apple Pay branding and interface elements correctly. For recurring payments, you must disclose the renewal term, what each period provides, the actual charges and how to cancel.
Native iOS integration with PassKit
A minimal checkout has four parts: a PKPaymentButton, a PKPaymentRequest, a PKPaymentAuthorizationController and the PKPayment you get back. This example sells a physical grocery order, the kind of purchase Apple Pay is meant for:
            import PassKit

@MainActor
final class CheckoutCoordinator: NSObject, PKPaymentAuthorizationControllerDelegate {
    private let networks: [PKPaymentNetwork] = [.visa, .masterCard]

    // 1. Only show Apple Pay when the person can pay with a supported network.
    var canUseApplePay: Bool {
        PKPaymentAuthorizationController.canMakePayments(usingNetworks: networks)
    }

    // 2. Build the request and 3. present the payment sheet.
    func startPayment(amount: NSDecimalNumber) {
        let request = PKPaymentRequest()
        request.merchantIdentifier = "merchant.com.example.store"
        request.countryCode = "IN"
        request.currencyCode = "INR"
        request.supportedNetworks = networks
        request.merchantCapabilities = [.threeDSecure]
        request.paymentSummaryItems = [
            PKPaymentSummaryItem(label: "Grocery order", amount: amount, type: .final)
        ]

        let controller = PKPaymentAuthorizationController(paymentRequest: request)
        controller.delegate = self
        controller.present { presented in
            if !presented { print("Unable to present Apple Pay") }
        }
    }

    // 4. Send the token to your backend and report its real result.
    func paymentAuthorizationController(
        _ controller: PKPaymentAuthorizationController,
        didAuthorizePayment payment: PKPayment,
        handler completion: @escaping (PKPaymentAuthorizationResult) -> Void
    ) {
        // PaymentAPI is your own networking code that calls your backend and PSP.
        PaymentAPI.submitApplePay(token: payment.token.paymentData) { approved in
            completion(PKPaymentAuthorizationResult(status: approved ? .success : .failure, errors: nil))
        }
    }

    // Required: called after the result is shown, or when the person cancels.
    func paymentAuthorizationControllerDidFinish(_ controller: PKPaymentAuthorizationController) {
        controller.dismiss()
    }
}
A few details from Apple's documentation are worth knowing:
- Check availability at runtime.
canMakePayments(usingNetworks:)tells you whether the person can pay through any of the networks you list. Don't assume every iPhone user has an eligible card in Wallet.
- Set the merchant's country.
countryCodeis the country of your business's principal place of business, which is often where the payment settles, and Apple Pay may use it to produce payment data that meets local regulations.currencyCodesets the currency your summary amounts are in. Confirm both with your PSP.
- Use the current capability name.
.threeDSecureis the current name for 3-D Secure support; older code uses.capability3DS.
- Implement the finish callback.
paymentAuthorizationControllerDidFinish(_:)is a required delegate method and the place to dismiss the sheet. If the person cancels, it is the only method called.
- Don't report success early. Return
.successonly after your backend or PSP confirms the payment. The sheet closing is not a settled payment.
For cross-platform apps, Flutter reaches PassKit through a plugin or a platform channel to native code, and the iOS target still needs the Apple Pay capability and your merchant ID. Our Flutter app development team can wire this up.
The payment token and backend flow
This is where many first integrations go wrong. The app sends payment.token.paymentData to your own backend, and your backend either passes it to your PSP or, in a merchant-side model, verifies and decrypts it itself before processing.
Never put payment secrets in the app. The iOS binary shouldn't contain a PSP secret key, the payment processing private key, backend or database credentials, or any other merchant processing secret. The app talks only to your backend, for example with a request to POST /api/payments/apple-pay carrying just what your PSP integration needs:
            {
  "orderId": "ORD-1001",
  "paymentMethod": "apple_pay",
  "paymentToken": "<encrypted-token>"
}
Your actual schema should follow your PSP's Apple Pay requirements. Track the payment with explicit states, such as created, Apple Pay authorised, processing, authorised and captured, plus failure states for failed, cancelled, declined and expired. Don't mark an order paid just because the Apple Pay sheet closed successfully.
Integrating through a payment service provider
For most production apps, a PSP cuts the integration work, and Apple itself tells merchants on an e-commerce platform or payment platform to check with that provider. Apple names BillDesk, Cashfree, Juspay, Mswipe, Paytm, PayU, Pine Labs and Razorpay among the PSPs bringing Apple Pay to Indian merchants.
The responsibilities split like this:
| Apple handles | Your backend and PSP handle |
|---|---|
| The Apple Pay sheet and user interface | Token processing |
| Device authentication | Authorisation and capture |
| Tokenisation and the encrypted payment token | Refunds and reconciliation |
Without a PSP, your backend decrypts and processes tokens against card-processing infrastructure itself. With a PSP, your backend hands the token to the PSP, which takes it to the card network. The exact steps vary by provider. If you already use Razorpay, Cashfree, PayU, Juspay or another provider, read its current Apple Pay documentation before building any token processing of your own, and don't assume your existing card checkout means Apple Pay is switched on for your merchant account.
Apple Pay on the web
Apple Pay also works on websites. Safari supports two JavaScript APIs for it: Apple's own Apple Pay JS API and the W3C Payment Request API. On iOS, both Safari and SFSafariViewController support Apple Pay.
The web needs more setup than an app. You register your merchant ID, create two certificates and verify your domain. The second certificate, a merchant identity certificate, authenticates your sessions with Apple Pay's servers and is needed only for the web. At checkout, your server uses the validation URL from the payment event to request a merchant session from Apple Pay. Apple is explicit: never send that request from the client.
| Channel | What it uses |
|---|---|
| iOS app | PassKit, PKPaymentRequest and PKPaymentAuthorizationController |
| Website | Apple Pay JS or the Payment Request API, a merchant identity certificate, domain verification and server-side merchant validation |
If you run both an app and a website, you can use the same merchant ID and payment processing certificate for both.
Security, privacy and tokenisation
Security is the main architectural difference between Apple Pay and collecting card details yourself. Apple says that when someone uses a card with Apple Pay, the actual card number isn't stored on the device or on Apple's servers, and Apple doesn't share it with the merchant. Instead, a unique Device Account Number is assigned, encrypted and stored in the Secure Element, a certified chip on the device.
Apple also says it doesn't keep transaction information that can be tied back to the user, and that a person whose iPhone is lost or stolen can use Find My to locate or lock it, or suspend payments from it. For merchants, the practical result is simple: you don't need to store raw card numbers to accept Apple Pay. The payment token is the handoff between Apple Pay and your payment infrastructure.
Why Apple Pay can help Indian apps
For an app with eligible customers, the main benefit is less friction at checkout:
- Faster checkout. Customers authorise payment in the Apple Pay sheet instead of typing card details each time.
- Less typing. Apple says customers can pay in apps and on the web without creating accounts or repeatedly entering contact information, card details, or shipping and billing addresses.
- Strong authentication. Payments are confirmed with Face ID, Touch ID or the device passcode.
- Tokenised payment data. You never receive the customer's card number.
- Guest checkout. Apple's design guidelines advise against requiring account creation before purchase.
- Card rewards stay. Apple says customers keep earning their card's rewards and benefits.
- Apple Watch in stores. A double-click and a tap at the terminal suits fitness, ticketing, food, travel and quick commerce.
Apple Pay doesn't solve every payment problem. Customers who mainly use UPI, RuPay cards, unsupported bank cards or unsupported devices can't use it as their main method today. Design Indian checkouts around a choice of payment methods, not around replacing your stack. If you also build Wallet experiences, see our guide to iOS 27 Wallet for D2C and retail brands in India.
Developer implementation checklist
Before you ship, confirm:
- Your Apple Developer account, merchant ID and payment processing certificate, or your PSP's equivalent setup
- The Apple Pay capability in Xcode, with the right merchant ID in the entitlement
- That what you sell qualifies for Apple Pay under App Review Guidelines 3.1.1 and 3.1.3(e)
- Supported networks, country code and currency
- Your
PKPaymentRequest,PKPaymentAuthorizationControllerand both required delegate callbacks
- Your backend payment endpoint, your PSP's Apple Pay support and server-side payment verification
- Handling for success, failure and cancellation, plus refunds and reconciliation
- Purchase disclosures and Apple Pay branding under Guideline 4.9
- Tests in your PSP's sandbox and on real devices with an eligible card
How eCorpIT can help
eCorpIT is a Gurugram-based technology organisation, founded in 2021, assessed at CMMI Level 5 and MSME certified, with senior-led engineering teams working across AWS, Microsoft and Google platforms. Our fintech and payments app development team adds Apple Pay alongside UPI, cards and net banking in Indian checkouts, working with your existing PSP. Our iOS app development team in India handles the PassKit integration, merchant setup and App Review requirements, and builds the backend flow that confirms each payment before the order is marked paid. If you need more capacity, you can hire iOS developers from our team. Talk to us at /contact-us/.
Last updated: 30 September 2026.